You only need 5 ingredients for these crumbles and they’re so easy to make. If you’ve got some tofu in the fridge, skip the store-bought and make these for way cheaper instead!
I love adding these crumbles to:
a big pile of nachos,
tacos and enchiladas,
spaghetti or bolognese
a hearty bowl of chili
You name it!
Advertisements
Advertisements
Ingredients:
1 14 oz block extra firm tofu
2 tbsp nutritional yeast
3 to 4 tbsp soy sauce (or tamari)
1 tbsp olive oil
1/2 tsp liquid smoke
Instructions:
Preheat your oven to 350F.
To a medium sized bowl, add the nutritional yeast, soy sauce, olive oil, and liquid smoke. Whisk together.
Crumble the tofu into small pieces and stir it into the liquid mixture.
Spread the crumbles out on a parchment-lined baking sheet in an even layer and pop that tray in the oven.
Bake for 35 to 45 minutes, stirring occasionally to prevent burning. (I usually will first stir it after about 20 minutes, and then every 5 to 10 minutes until it becomes nice and brown and crispy.)
Go forth and use the baked crumbles however you desire!
Oh man… Have I mentioned my love for sun-dried tomatoes before? Yes? Well I’m gonna say it again – that intense, sweet-tart flavor is everything!
Some lovely sun-dried tomatoes along with sautéed onions and garlic, white wine, baby spinach, and a cashew cream sauce make this vegan pasta dish so creamy and flavorful!
Advertisements
The fusilli pasta really grabs as much of the sauce as possible – it’s awesome.
Cook up this dish and be amazed as your multiple cups of spinach are reduced to what seems like a tablespoon. We’ve all been there, am I right?
Advertisements
Caution: be sure to cook enough for all parties present because your house will be smelling heavenly. Thank you onion, garlic, and sun-dried tomatoes.
Anyways, let’s get to it:
Advertisements
Prep time: 10 minutes – Cook time: 15 minutes – Serves: About 4 people
Ingredients:
1 cup raw cashews, soaked overnight or use this quick boil method*
1/4 cup nutritional yeast
1 tbsp lemon juice
1 cup vegetable broth or water (if using water, you may want to add a bit more salt)
1 tbsp of oil from the sun-dried tomatoes
1/2 of one medium yellow onion, finely diced
3 – 5 cloves of garlic, minced
1/4 tsp red pepper flakes
3/4 cup julienne-cut sun-dried tomatoes in oil, roughly chopped
1/3 cup white wine (I used a vegan pinot grigio)
3 – 4 cups of baby spinach, optional
salt and fresh ground pepper, to taste
pasta water to thicken if needed
16 oz fusilli pasta, cooked (you could also use bowties, penne, fettuccine, you name it)
vegan parmesan for topping (optional)
Advertisements
Instructions:
Begin boiling the water for the fusilli pasta and cook according to package directions.
Make the cashew cream by blending cashews, lemon juice, nutritional yeast, and vegetable broth until very smooth.
Heat oil over medium heat in a large pan and sauté the onion with a pinch of salt. Cook until tender and translucent, about 3-5 minutes.
Add in the garlic and red pepper flakes and cook for another minute.
Then, toss in the sun-dried tomatoes and cook for about 2 minutes.
Pour in the wine and simmer for a few more minutes until the wine has reduced by half. Add spinach, if using, and cook until wilted.
Stir in the cashew cream and a few cracks of fresh ground black pepper until combined. Cook to thicken. If it gets too thick, stir in small amounts of the pasta water until desired consistency is reached. Add in the pasta noodles and stir again to coat.
Top with vegan parmesan if you’d like, serve, and enjoy!
*Quick-boiling cashews: If you’re not someone who plans out far enough ahead to soak cashews overnight, you can add the cashews to a small sauce pan, cover with water, and bring to a boil. Once it starts boiling, remove from the heat immediately, cover with a lid, and let sit for 10 minutes to soften.
I love serving this gravy over roasted garlic mashed potatoes or poutine (which – for those of you who may not know about this Canadian delicacy – is fries, gravy, and cheese curds). Obviously we ain’t cooking with any cheese curds here, but I’ve tried it with homemade vegan mozzarella as well as store-bought Violife feta and both are fantastic!
I’d absolutely bring this to a holiday get together or a potluck – you’d never know it’s vegan! Plus gravy boats are adorable and now you have an excuse to use one.
Taste this recipe as you go. You may not like it quite as salty as me, so you can always start with less soy sauce/vegan butter.
Advertisements
Advertisements
Fun fact about poutine that I just found via cottagelife.com: “The traditional story is that poutine originated in the 1950s in Warwick, Quebec, at a restaurant called Le Lutin qui rit. Upon being asked to add cheese curds to a customer’s fries, owner Fernand Lachance responded, “Ça va faire une mauditepoutine,” or, “That’s going to make a dreadful mess.”
And what a delicious mess indeed!
Advertisements
Prep time: 5 minutes – Cook time: 1 hour – Serves: about 6 people
Ingredients:
1 small red or yellow onion, diced
3 tablespoons all-purpose flour
1/4 cup reduced sodium soy sauce or tamari
2 tablespoons vegan butter or olive oil
1 tsp organic sugar (I used coconut sugar)
2 cups vegetable broth
a few cracks of fresh ground pepper
Advertisements
Instructions:
Melt butter in a sauce pan over medium-low heat, then add in the diced onion.
Spread the onions in an even layer in the pan and let cook for 30 to 45 minutes, stirring occasionally. Don’t stir too often or they won’t brown enough to caramelize! You may want to stir in a teaspoon of sugar after about 10 minutes to speed up the caramelization process. If they start to brown too quickly or are drying out, add a splash of water and turn the heat down a bit. If they aren’t caramelizing quickly enough, turn the heat up a bit.
Add the flour to the now caramelized onions and stir to mix well. It should be a paste-like texture.
Slowly whisk in the vegetable broth, pouring small amounts in at a time. Then whisk in the soy sauce as well.
Raise the heat to medium and allow the mixture to come to a simmer.
Stir often and reduce heat if necessary until you’ve reached a gravy consistency of your liking. It’s usually about 5-10 minutes for me.
Crack in some fresh ground pepper, and voila! Serve over mashed potatoes, poutine, or any other gravy vessel.
Note: Store any leftovers in an airtight container in the fridge. You can reheat the gravy in the microwave or pour in back into a sauce pot on the stove. It may need a splash of water depending on how much it’s thickened.
No matter how many vegan meat alternatives come to market (like Beyond and Impossible), I’ll always love a good black bean burger. They pack so much flavor, and really spice up a plain ol’ burger in my humble opinion.
They’re great for any occasion, but I’m posting these on the 4th of July because Amurica, amiright? Make these for your guests and show off your thoughtfulness and the yumminess of vegan burgers, wahoo!
This recipe is loaded with spices and it makes me so happy. Making my own veggie burgers has been one of my recent favorite things to do. I love selecting and actually seeing all of the ingredients that go into the patties.
You can also make a large batch and freeze them! Way less expensive than spending $8 on a pack of 4 sad veggie patties in the freezer section.
Anyways, let’s get to it:
Advertisements
Advertisements
Burger contestant #1: The Mexi-Burger. I topped this one with cashew queso, pickled jalapeños, pico de gallo, and hot sauce. I’m not going to tell you what kind of hot sauce to use, because that is a personal choice not to be taken lightly. Some guac or avocado would have also been fabulous on this guy.
Advertisements
Burger contestant #2: The Classic American, sans red onion because the patty is already filled with them, ya know? You could definitely still add some fresh red onion for some color, crunch, and added onion-y-ness. In the realm of condiments, I just went with ketchup but usually am a fan of spicy mustard and some vegan mayo on my classic style burgers. This is about the patties, though, the patties.
Advertisements
Prep Time: 10 minutes – Cook Time: 24 minutes – Makes 6 to 7 large patties
Ingredients:
1/2 of one small onion (red or yellow)
1/2 of one red bell pepper
2 (14oz) cans of black beans, or 1 20oz can (drained and rinsed)
1/4 cup oat flour or panko
1/4 cup corn
flax egg (1 tablespoon flax meal + 2.5 tablespoons water, mixed in a small bowl and left to thicken for 5 minutes)
1 tablespoon soy sauce or tamari
1 tablespoon nutritional yeast
1 teaspoon onion powder
1 teaspoon garlic powder
2 teaspoon cumin
2 teaspoon chili powder
1/2 teaspoon smoked paprika
1/2 teaspoon salt (or to taste)
a few cracks of fresh ground pepper
1/4 teaspoon cayenne pepper (optional)
Advertisements
Instructions:
Sauté onion over medium heat for 3 minutes (either with a small bit of oil, or water for oil-free), add the bell pepper and cook for another 3 minutes or so until the onions are translucent and the peppers are tender but not mushy.
Add all of the ingredients to a large bowl and mash or use a food processor to mix. You want to still have some whole beans in there, so don’t go overboard with the mashing/mixing.
Form about 6 to 7 large patties, packing each one tightly.
Bake at 350F on a parchment lined baking sheet for 24 minutes, turning them halfway through.
Serve with your favorite burger toppings and enjoy! They’re also delicious crumbled in a taco salad.
Note:
To freeze these patties, place them on a baking sheet and stick them in the freezer for about 45 minutes. Then you can add them to a freezer bag or container and save for a later date. I like to add a small piece of parchment paper between each patty to prevent them from sticking together in the freezer. I’ve baked them thawed and from frozen, and both work just fine!
Before going vegan, there was this dish I really liked called Brazilian Shrimp Soup. I loved the creaminess of the coconut milk and heartiness of the rice and tomatoes. I realized that the shrimp in the dish wasn’t even the best part for me, and thought “duh – who needs shrimp anyways?!” Chickpeas are way cooler. (insert sunglasses emoji)
This vegan version is so
tasty
creamy
hearty
and animal-free! Yay!
Advertisements
The chickpeas add a delicious crunch and savoriness to this soup.
They make it heartier and healthier, too, of course!
I totally recommend serving the soup with some crusty bread to soak up all that creamy, tomatoey goodness.
Advertisements
15 minutes prep time – 35 minutes cook time – Serves about 4
Ingredients:
1 tbsp olive oil
1 bell pepper, chopped (I used half a red and half a green for color)
1 small onion, chopped
1 can petite diced tomatoes (15oz, no salt added)
1 can tomato sauce (8 oz, no salt added)
3 – 4 cloves of garlic, minced
1 tbsp tomato paste
1 cup long-grain rice
1/2 can full fat coconut milk
2-3 cups of vegetable broth (depending on how thick you want it)
1 tsp salt
1/2 tsp red pepper flakes (or to taste)
The juice of half a lemon (about a 1 1/2 tbsps)
Green onion, chopped (to add on top at the end)
For the chickpeas:
1 can chickpeas (15 oz) drained and rinsed
1/4 tsp olive oil
1/2 tsp paprika
1/4 tsp garlic powder
1/4 tsp salt
a couple cracks of fresh ground pepper
optional: cayenne pepper to taste (I added a couple dashes)
Advertisements
Instructions:
Heat oil in a heavy pot over medium heat. Add the onion with a pinch of salt and sauté for a few minutes. Then add the bell pepper and cook for another couple of minutes until the onions are translucent and soft. Next, add the garlic and sauté until fragrant (about a minute).
Add the rice, petite diced tomatoes, tomato sauce, tomato paste, red pepper flakes, and vegetable broth to the pot. Bring to a boil, then reduce heat to medium low and let it cook for about 15 minutes, or until the rice is done.
Stir in the coconut milk and cook for another 5 – 10 minutes.
Finish by adding in the lemon juice. Taste and adjust salt and pepper to your preferences.
Serve in bowls and top with the roasted chickpeas and green onions. And some crusty bread if you’re so inclined!
For the chickpeas:
Preheat your oven to 400F.
Drain and rinse the chickpeas and add them to a parchment lined baking sheet (you could also use a silicon mat).
Toss with a drizzle of olive oil, paprika, garlic powder, salt, fresh black pepper, and ground cayenne pepper.
Bake for 25 minutes, making sure to stir halfway through to ensure they’re evenly cooked.
Notes:
You’ll want to put the chickpeas in the oven around the time you’ve reduced the heat from a boil for the soup.
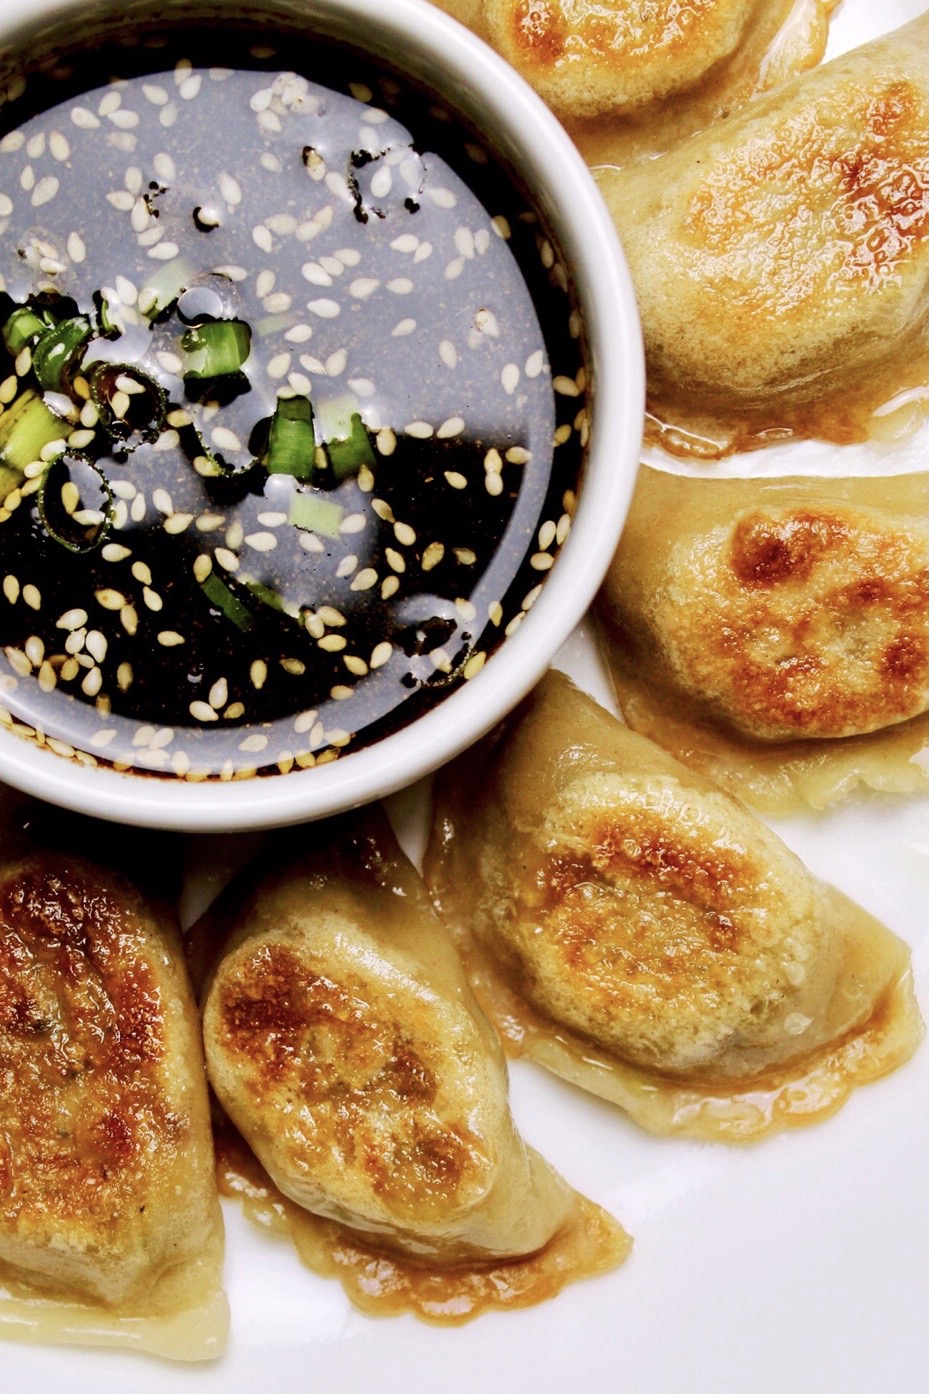
This dipping sauce is sweet, sour, and delicious. It’s super simple, too – you probably have most, if not all, of the ingredients in your kitchen already. Hurray!
I especially love this sauce with pan-fried tofu and vegetable dumplings, but it’s good on rice and with spring rolls as well.
Advertisements
Ooooh
Ahhhh
I’ve called for garlic and ginger powder, but definitely try it out with fresh minced garlic and grated ginger if you have them!
This make enough sauce for 15-20 dumplings, so double it if you’re in need of more.
Advertisements
Ingredients:
2 tbsp soy sauce
2 tbsp rice vinegar
1/4 tsp agave
1/4 tsp sesame oil
a pinch of garlic powder
a pinch of ginger powder
1/4 tsp sesame seeds
sliced green onion (optional)
Instructions:
In a small bowl, whisk together all of the ingredients.
Top with the chopped green onions.
Get to dippin’ and enjoy!
Notes:
If you’d like to make this a spicy vegan asian dipping sauce, go ahead and stir in a pinch or red pepper flakes or a squirt of sriracha!
As I’m sure a handful of people close to me would tell you, this is basically my go-to meal. On the semi-rare occasion that I’m cooking only for myself, this recipe is such a staple!
Not only is it really tasty, it leaves my body feeling good afterwards.
Advertisements
This Roasted Chickpea and Broccoli Bowl is:
crunchy
savory
tangy
healthy
and delicious!
The variety of flavors and textures come together so nicely in this easy to make, quick to clean up meal. I make my own little hummus dressing for it, but you can use whatever!
Place the chickpeas and broccoli on your parchment-lined baking sheet, then season and toss. You could use a silicone baking mat in place of parchment paper, of course!
Make sure all of the chickpeas and pieces of broccoli are spread out some and touching the parchment paper. This will help them roast evenly and get crunchy.
Advertisements
While the chickpeas and broccoli are in the oven, whip up this simple hummus dressing. It consists of: hummus (duh), lemon juice, water, black pepper, dijon mustard, and garlic powder. Bet you have all those things at home!
If not, you can use a dressing you already have or just skip it altogether. The chickpeas are already very flavorful, and I’d recommend squeezing some lemon juice on the broccoli when it’s done. Or sprinkle it with some lemon pepper seasoning before baking.
Advertisements
When you’ve finished baking them, add the chickpeas and broccoli to a big bowl and throw in any other good stuff you have laying around. Then drizzle it with the hummus dressing and enjoy!
Sometimes I’ll add a few handfuls of baby spinach, hemp hearts, chia seeds, flax seeds, kalamata olives, or some cherry tomatoes like I did this day. I’ll make some roasted potatoes to throw in as well if I’m extra hungry or am serving it to more than just myself.
Bowls like this are a good way to get some additional nutrients, eat your colors, and use up whatever odds and ends you have sitting around in your kitchen.
Advertisements
Ingredients:
1 can of chickpeas (15oz), drained and rinsed
A few handfuls of frozen broccoli florets
1/4 tsp garlic powder
1/2 tsp paprika
a dash of cayenne pepper
salt and fresh ground pepper to taste
For the hummus dressing:
1 tbsp hummus
1 tsp lemon juice
1 tbsp water
1/4 tsp dijon or stone ground mustard
1/4 tsp garlic powder
a crack of fresh ground pepper
Advertisements
Instructions:
Preheat your oven to 400F. Place chickpeas and frozen broccoli on a parchment-lined baking sheet.
Add garlic powder, paprika, cayenne pepper, and salt to the chickpeas. Sprinkle the broccoli with salt. Toss everything to coat with spices. No need for oil!
Bake for 25 minutes, making sure to toss halfway through the cook time.
Eat a chickpea and examine your broccoli. Are they roasted and crunchy enough for your liking? If not, add them back to the oven for another 5 minutes.
Assemble a nice little bowl with the chickpeas, broccoli, and whatever yummy odds and ends you’d like. I threw in some cherry tomatoes.
Crack some pepper and drizzle the hummus dressing over top. Then enjoy!
Notes:
Sometimes I’ll add a few handfuls of baby spinach, hemp hearts, chia seeds, flax seeds, kalamata olives, or some cherry tomatoes like I did this day. I’ll make some roasted potatoes to throw in as well if I’m extra hungry or am serving it to more than just myself!
My mother would make it fairly often growing up and I always loved ordering it out at restaurants, so it’s a dish that has been with me for a while! I’ve tried out so many different recipes over the years and I’ve finally found my own way of making it that I like best.
Advertisements
Come to mama. See how pretty those red onions on top are?
Ready for the pot! Yes, that is my compost scrap bowl. Yes, I thought it was pretty.
Advertisements
So colorful! Time to add in the beans, broth, and cumin. Then let that baby simmer!
This soup is so flavorful and filling, and I love having it whether it’s hot or cold out. Serving it over some rice (perhaps some cilantro lime) is also a good way to bulk this meal up and add some lovely texture.
Advertisements
The soup after using my immersion blender. I suppose I’m in my blue period or something.
And voila! Topping this soup with some fresh red onion is probably my favorite thing to do. I love the contrast in flavor of the raw onions and the cooked ones, and they add a really nice crunchy texture! You could also top with some fresh cilantro, which I would’ve done if I wasn’t out.
It stores well, too, and becomes even more flavorful overnight in the fridge! So this is the perfect recipe to make a lot of and eat throughout the week. Anyways, here’s the recipe:
Half of 1 large red onion, diced (reserve a bit for topping later)
1 bell pepper (any color would be good, but I like using red)
1 jalapeño, seeded and minced
2 cloves of garlic, minced
1 tbsp olive oil (any neutral flavored oil, like avocado would be fine)
1 tbsp cumin
2 cans (15oz) black beans, drained and rinsed
2 cups vegetable broth
1/4 tsp salt
The juice of 1 lime (about a tablespoon of red wine vinegar can be used in place of it)
Advertisements
Instructions:
Heat oil over medium heat in a heavy pot. Add onion, carrot, celery, and a pinch of salt. Cook for 5 minutes, stirring occasionally.
Add the bell pepper, cook for another 5 minutes.
Add in the jalapeño and garlic, and sauté for about a minute, until fragrant.
Pour in the black beans, vegetable broth, and cumin. Stir and bring to a boil.
Reduce the heat and let it simmer for about 25 minutes.
Add in the lime juice and salt.
Use an immersion blender, a hand masher, or transfer about 2 cups of the soup to a blender, then re-add to soup. You want it blended just enough to get that creamy texture, while still having some visible pieces of beans and veggies floating about.
Taste and adjust salt and pepper to your preferences. Serve on its own or over some rice, and top with reserved diced red onion. Some cilantro would also be great!
Enjoy!
Notes:
If you like things a little spicier, add in 1/4 tsp (or more) of red pepper flakes when you add in the lime juice. (I do this!)
A cup of corn would also make a yummy, colorful addition to this soup!
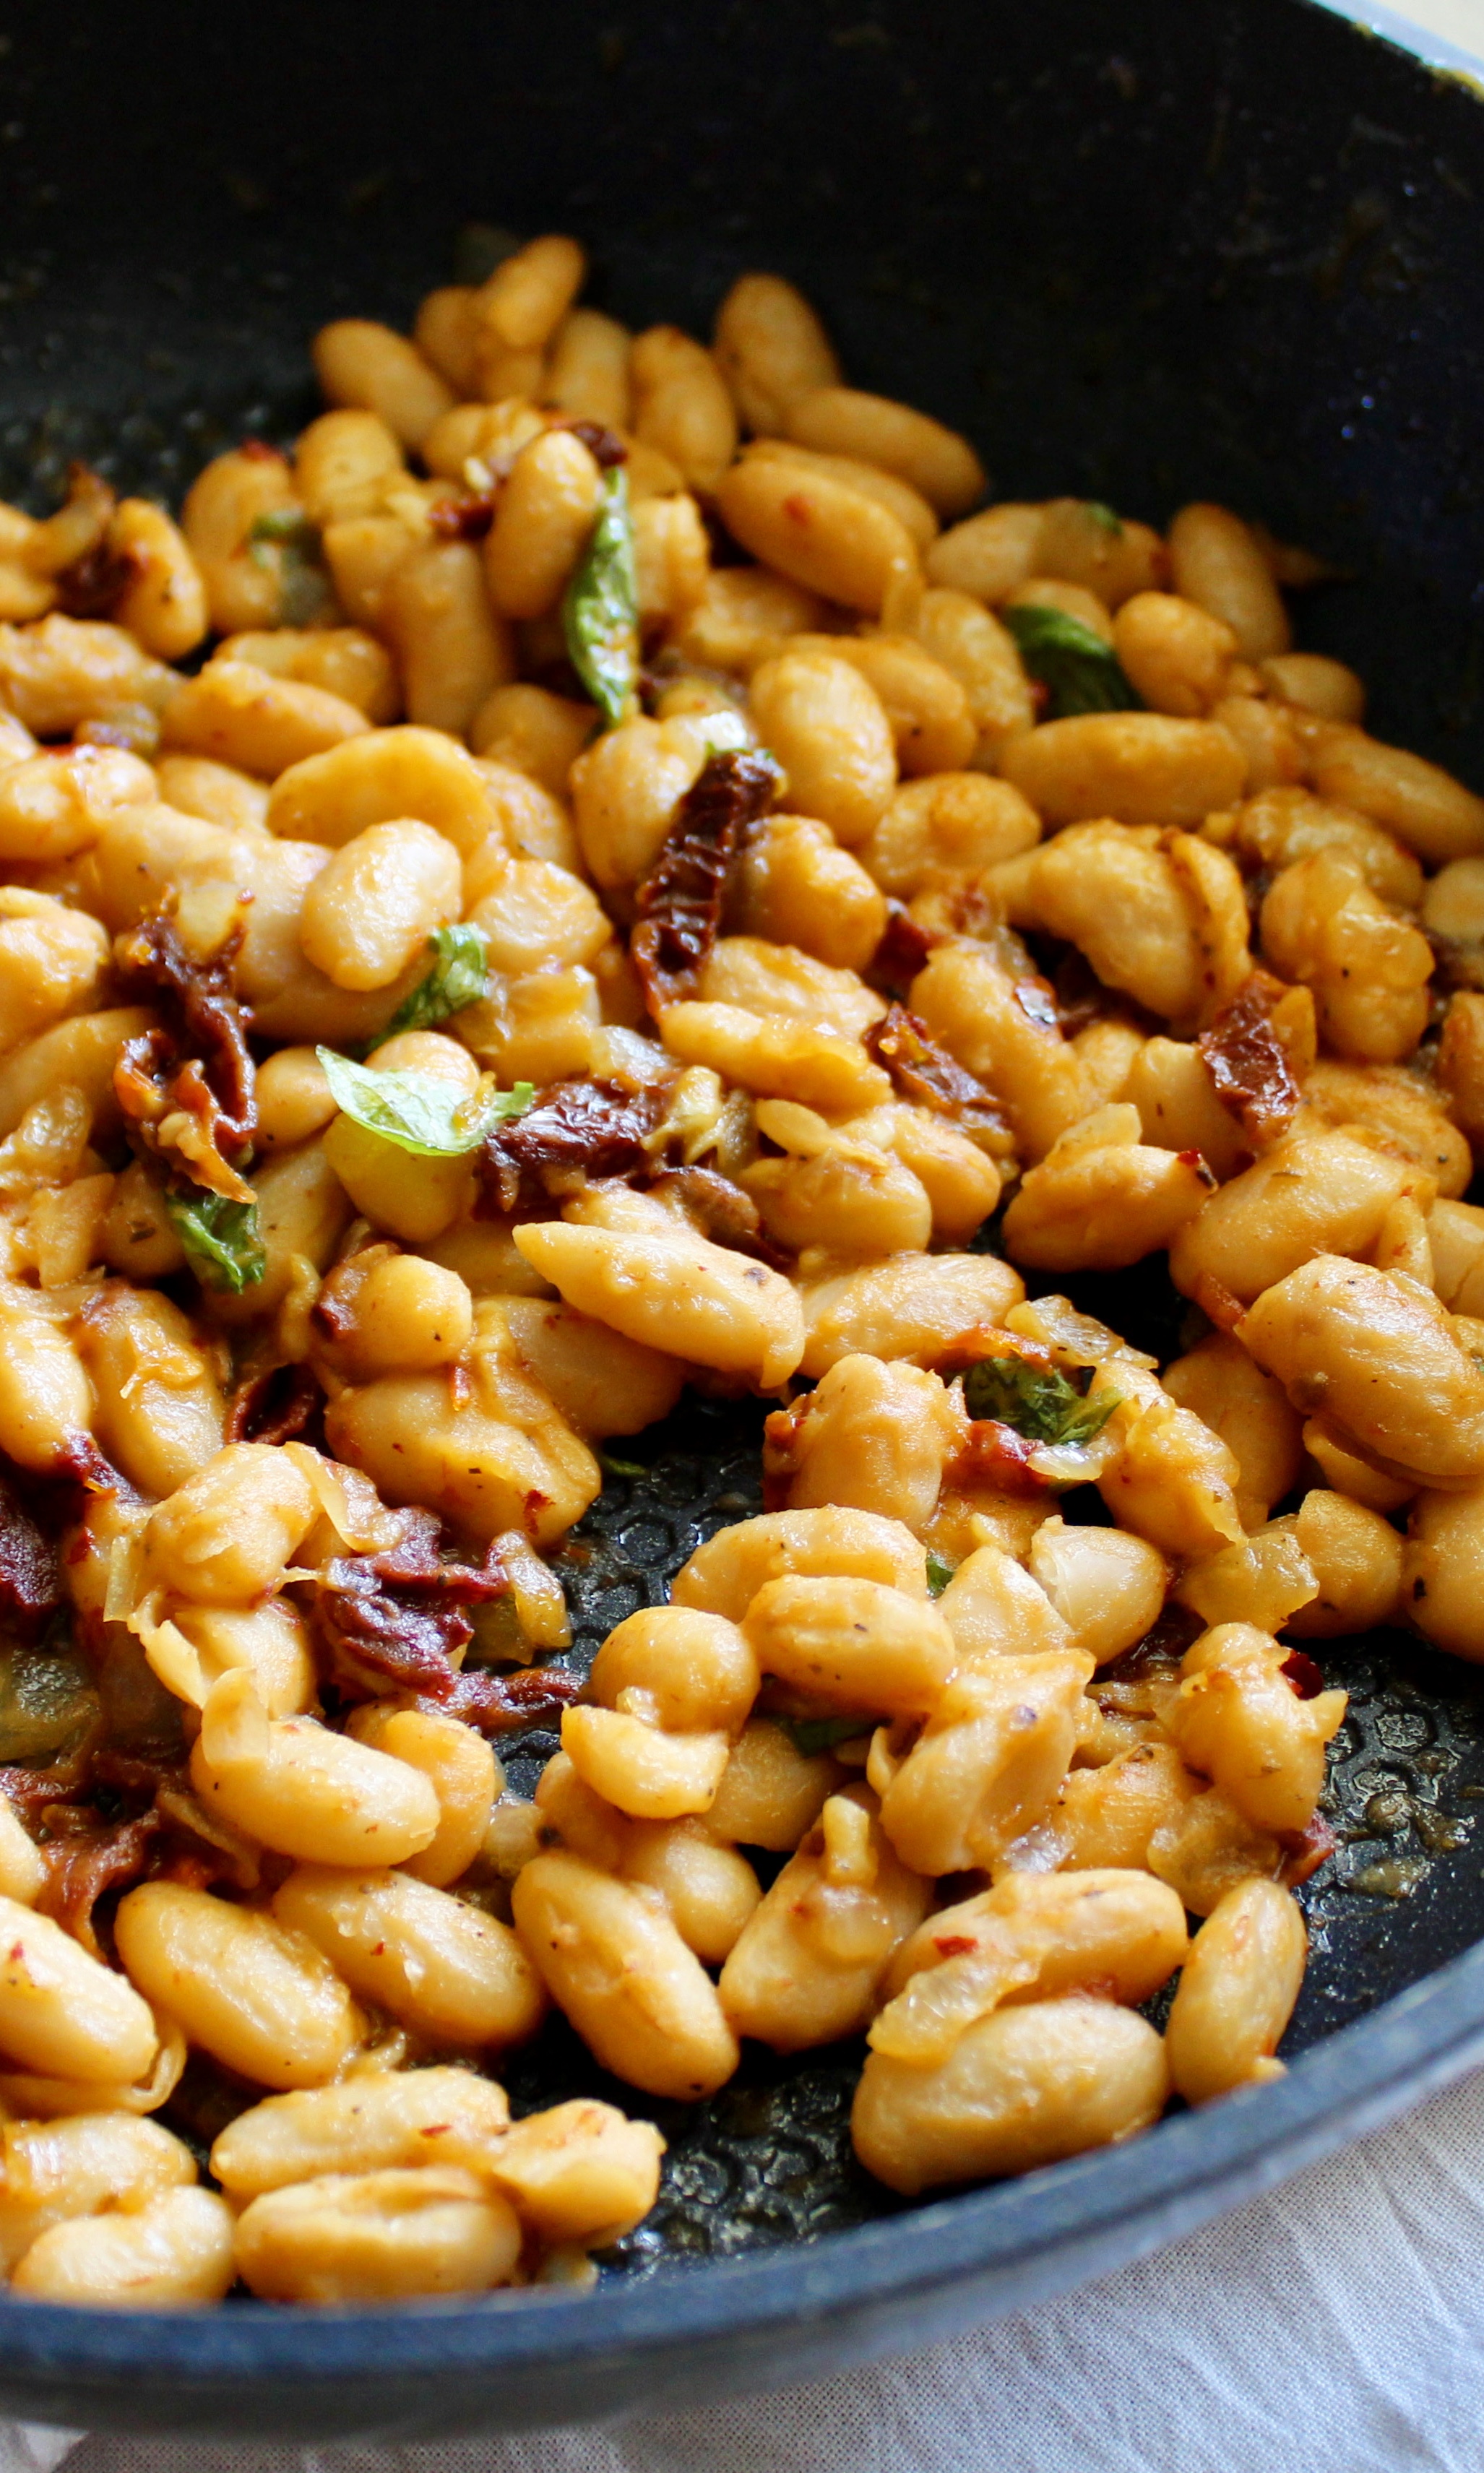
Do I need to say anything further than sun-dried tomatoes and fresh basil? And it only has, assuming you already have salt and pepper, 5 ingredients? This savory side is a great vegan dish to bring to spring and summer get togethers, and would pair wonderfully with a veggie burger or a big salad. Or you could just eat it on its own, of course. Anyways, here ya go!
Advertisements
Okay this smells amazing.
Advertisements
Cannellini beans are so silky, nutty, and creamy. Yum.
Advertisements
Cook Time: 15 minutes – Prep Time: 5 minutes – Serves about 4 as a side
Ingredients:
1 tablespoon of the oil from the sun-dried tomatoes
1 small yellow onion, or about 1/3 of a large one.
About 2 tablespoons of julienne cut sun-dried tomatoes in oil
2 cloves of garlic
1 15 oz can cannellini beans, rinsed and drained
1/4 teaspoon salt
A few cracks of fresh ground pepper
1/4 teaspoon red pepper flakes (optional but recommended)
A handful of fresh basil leaves, to taste
Advertisements
Instructions:
In a non-stick pan over medium heat, add the oil from the sun-dried tomatoes. Add the onion and cook for 5 minutes or until they have softened.
Mix in the sun-dried tomatoes and cook for another 5 minutes, stirring occasionally.
Next, add the garlic and let cook for another minute before adding the beans, salt, a few cracks of fresh pepper, red pepper flakes if using, and basil. Stir to combine and heat through for another minute or two.
Remove from heat and enjoy!
Notes:
This dish is great both warm and cold, depending on what you’re in the mood for. You can totally make this in advance if you’re bringing it to a cook out or picnic, and serve it chilled! Just make sure to double or triple the recipe.
I’m so excited for warm weather foods now that Spring has sprung! This recipe is full of flavor and texture, and can be customized to your own taste preferences. Personally, I love adding as many fresh toppings as physically possible. These are perfect for a warm night with a cold glass o’ beer (or water – you do you), and remind me of eating fish tacos in the Bahamas when I was younger. Minus the fish now, of course!
Advertisements
Advertisements
Is there anything prettier than roasted chickpeas? Or do I just have an obsession?
Advertisements
Makes about 6 tacos – Cook time: 25 minutes – Prep time: 10 minutes
Ingredients:
1 16 oz can of chickpeas, drained and rinsed
Fajita sized tortillas (I like corn)
Hot Sauce (I prefer Frank’s RedHot)
Salt to taste (I used about 1/4 tsp)
1/4 tsp Garlic Powder
1/4 tsp Onion Powder
1/2 tsp Olive Oil
Celery, chopped
Cabbage Mix or whatever lettuce you prefer
Vegan Ranch Dressing (Just brand is great)
Fresh Cilantro (skip it or use parsley if you’re a soap person)
Fresh Ground Pepper
Lime Juice
Optional toppings: avocado, radish slices, green or red onion
Instructions:
Preheat your oven to 400° F.
Place drained and rinsed chickpeas on a parchment lined baking sheet (or use a silicone mat if you have one). If they’re still really wet, dab the chickpeas with a towel to remove some of the excess water.
Toss to coat chickpeas with oil, salt, garlic powder, and onion powder.
Bake for 20 minutes, making sure to give them a stir halfway through the cooking time.
Remove from oven and toss chickpeas with hot sauce (about 2 tablespoons), then put them back in the oven to bake for another 5 minutes. Leave them in for a few more minutes if you want the chickpeas to be a bit crunchier.
Take the chickpeas out of the oven and assemble your tacos with desired toppings. If you like things spicier, you can add some extra hot sauce on top. Grind a bit of pepper and squeeze some lime over the tacos at the end. Enjoy!
My favorite toppings are cabbage, avocado, celery, cilantro, and ranch 🙂